
AI portraits have gained popularity recently, especially with the emergence of a certain phenomenal camera. By simply uploading your photo, you can generate beautiful portrait pictures. This product has once again ignited interest in AI art. Today, I will share a method for creating real AI portraits using the Stable Diffusion WebUI, allowing for quick image generation without the need for training. Specifically, this method involves utilizing the face-swapping capability of Stable Diffusion’s Wensheng Image and the roop plugin.
Please note that this article only shares the technology behind creating AI portraits and does not encourage any malicious use. The author is not responsible for any face-swapping behavior conducted by readers after reading this article.
Installation of Plugins:
Two installation methods are introduced: one through the plugin extension and the other through manual uploading.
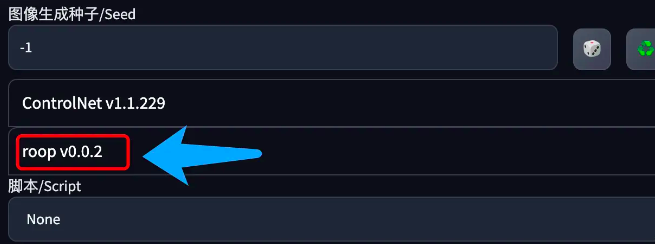
After the installation, you will see this option in the text-to-image or image-to-image tab, right below section of the Stable Diffusion WebUI
Method One:
Suitable for users with smooth access to various resources.
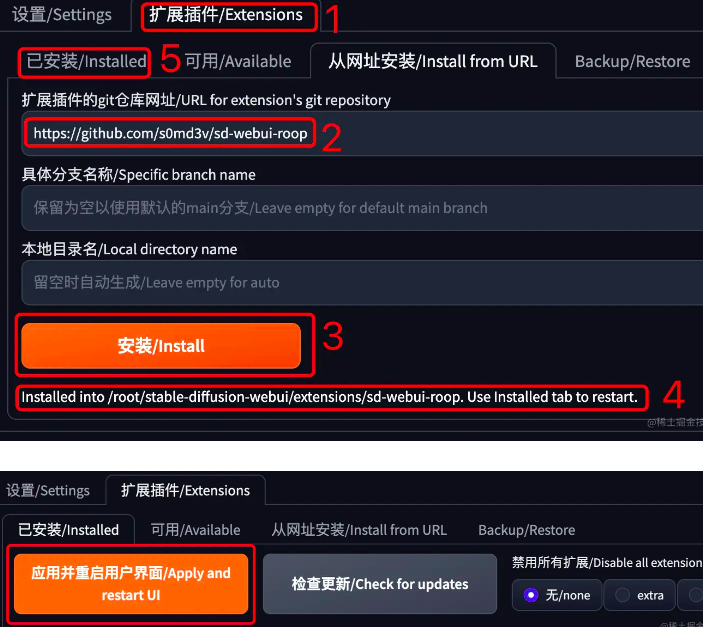
- Launch Stable Diffusion WebUI and go to “Extension Plugins” > “Install from URL.”
- Enter the following URL: github.com/s0md3v/sd-w…
- Click “Install.”
- Wait for the prompt “Use Installed tab to restart” to appear.
- Go to the “Installed” tab and click “Apply and restart the user interface.”
Note: if the webpage still fails to load after restarting for more than 5 minutes, check the console or terminal logs. It might be due to the slow download speed of the models required for the plugin. If the download is taking too long, you can interrupt the download and manually upload these files. For specific instructions on how to do this, refer to Method Two.
Method Two:
Suitable for users with restricted access to Github and HuggingFace.
You will need following files:
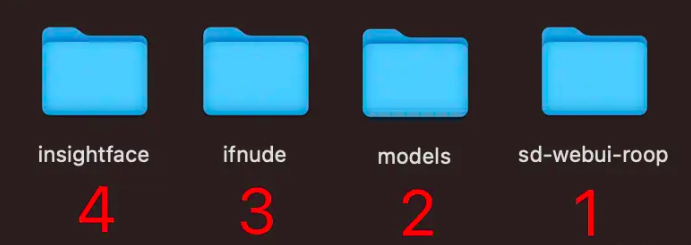
- Download the necessary files manually from Github and HuggingFace or use the provided compressed package:
- sd-webui-roop: github.com/s0md3v/sd-w…
- ifnude: huggingface.co/s0md3v/nudi…
- models: huggingface.co/henryruhs/r…
- insightface: huggingface.co/public-data…
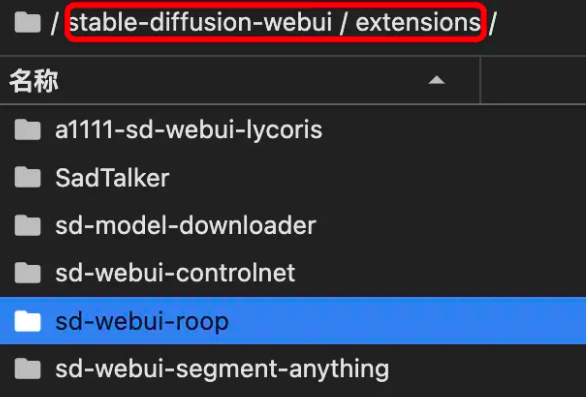
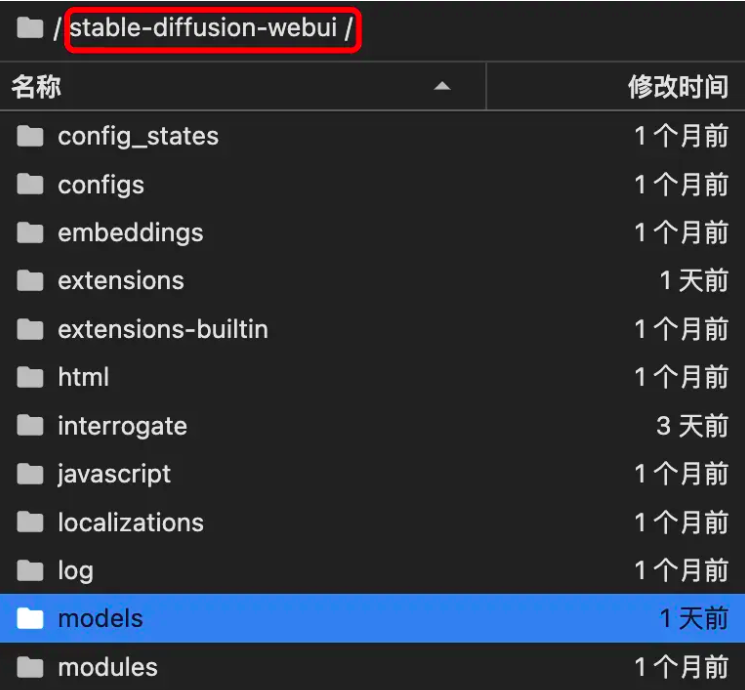
- Deploy the files to their respective locations on the server/PC(self-host):
copy sd-webui-roop folder to stable-diffusion-webui/extensions/
copy models folder to stable diffusion root directory:
ifnude and insightface folder are a bit tricky; they need to be placed in the user’s root directory, and the folders should be renamed starting with an period.
Taking ifnude as an example,
For Windows: C:\Users{YourLoginUsername}.ifnude
For Linux: /root/.ifnude
For Linux systems, after uploading ifnude and insightface to the root directory, you can quickly rename them using the following command.
mv /root/ifnude /root/.ifnude

mv /root/insightface /root/.insightface
At the end, restart Stable Diffusion WebUI
Face Swapping:
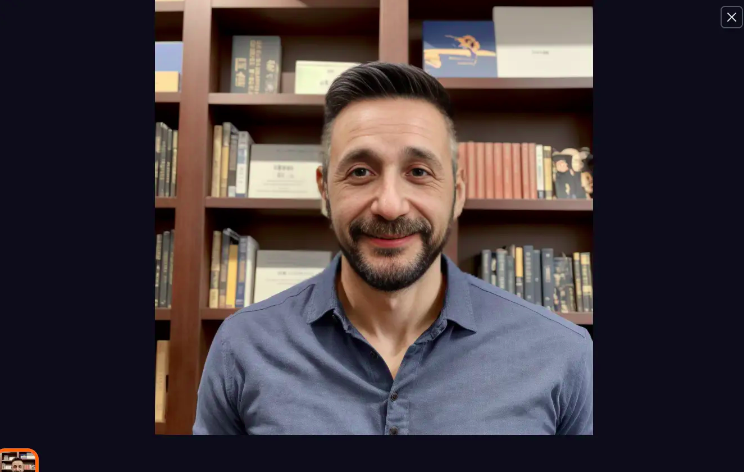
I will start by using ‘Text to Image’ to generate a photo of a 30-year-old Chinese man. The parameters below are just for your reference; as long as you can generate a portrait image, it’s sufficient. However, if you are new to SD (Stable Diffusion), feel free to follow the settings in the image entirely. Get the initial result and then customize it as needed.
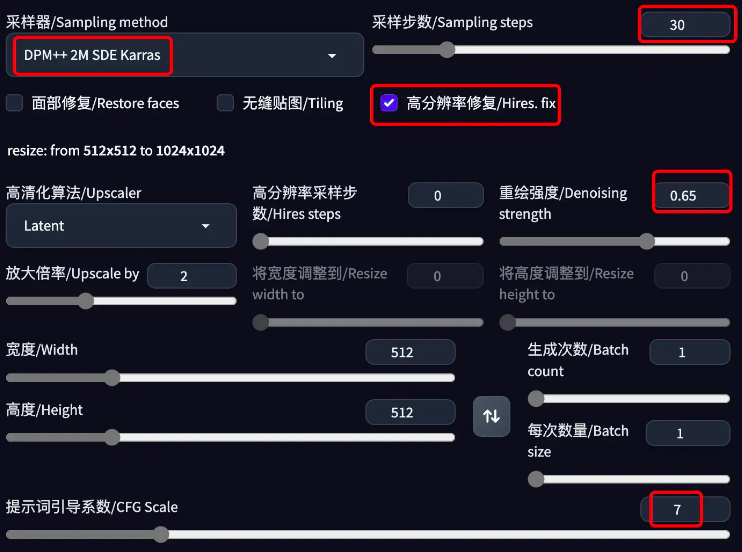
The specific parameters for image generation are as follows:
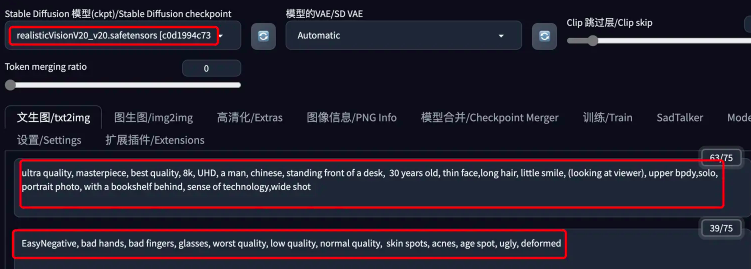
Checkpoint: realisticVisionV20 (Download link available at the end of the article)
Prompt: ultra quality, masterpiece, best quality, 8k, UHD, a man, Chinese, standing in front of a desk, 30 years old, thin face, long hair, slight smile, (looking at viewer), upper body, solo, portrait photo, with a bookshelf behind, sense of technology, wide shot
Negative Prompt: EasyNegative, bad hands, bad fingers, glasses, worst quality, low quality, normal quality, skin spots, acne, age spots, ugly, deformed
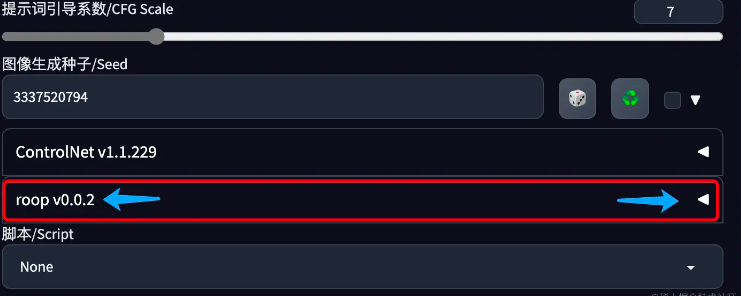
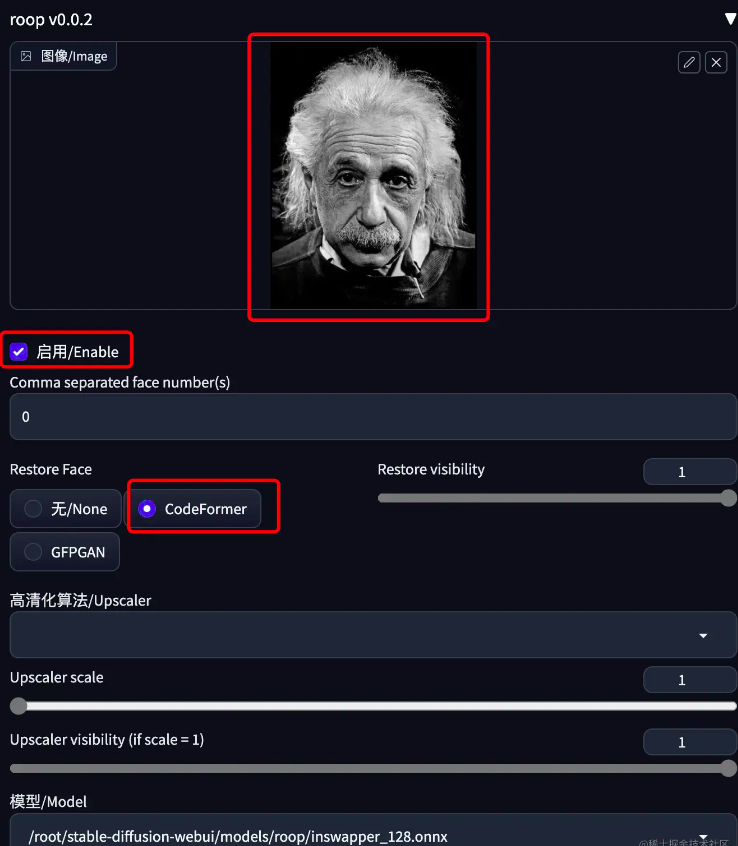
expand roop plug in:
And then upload a new face image with following setting, you test using CodeFormer vs GFPGAN :
Finally click “Generate” button, after few minutes, you should see the result:
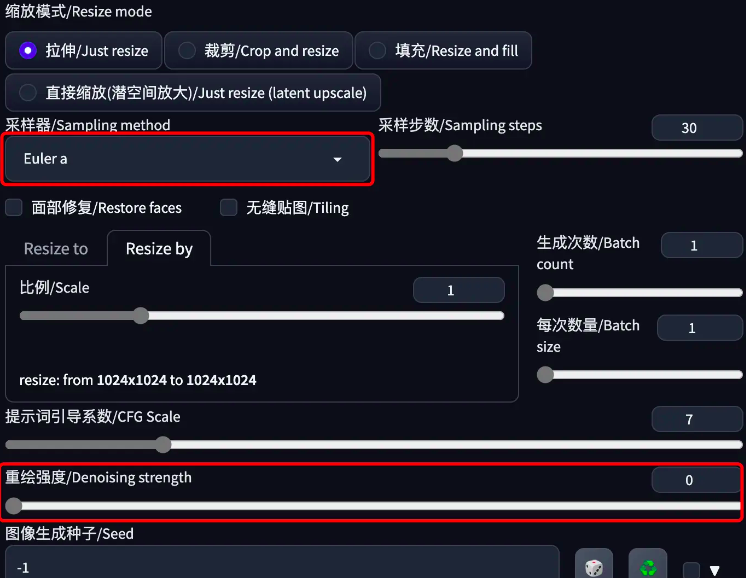
For image-to-image face swap:
In image-to-image tab, after upload the photo you want to be swap, then use followin setting:
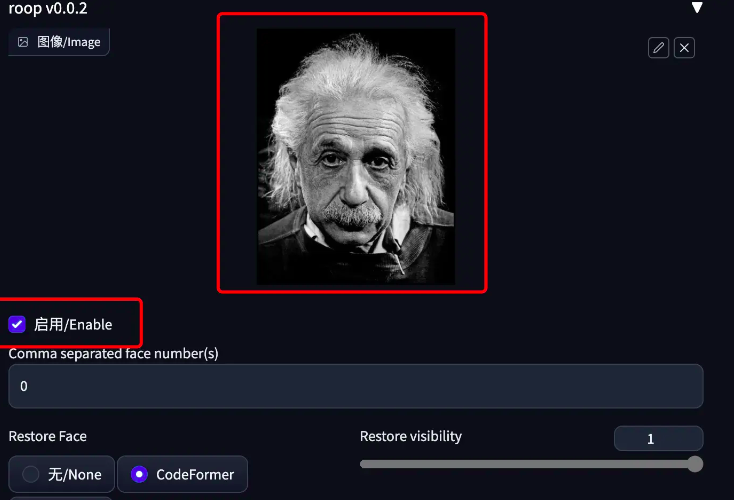
in roop plugin, upload the new face:
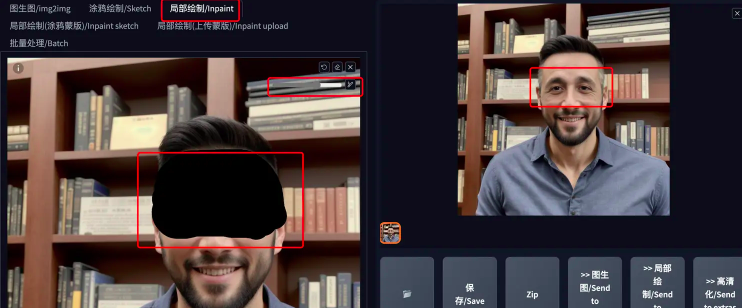
If you only want to replace a specific area on the face, you can also use the inpaint tab, and use your mouse to paint those area. The operation method is shown in the following figure:
After add a mask to the desired facial area, keep other parameters unchanged, and click ‘Generate.’
Done!
Please note that this article only shares the technology behind creating AI portraits and does not encourage any malicious use. The author is not responsible for any face-swapping behavior conducted by readers after reading this article.